DITO SIM Registration on iPhone vs Android: Key Differences

You bought a DITO SIM. You downloaded the app. You followed every step — and then it failed. The camera won’t open, the photo keeps getting rejected, or the OTP just never arrives. You search for help and every guide online tells you the same generic steps, with zero mention of what’s actually different between iPhone and Android.
That frustration is exactly why this guide exists.
DITO SIM Registration on iPhone vs Android is not the same experience — even though the form looks identical. The differences happen at the operating system level: how your phone handles camera permissions, what photo format it saves by default, how it routes OTP messages, and how it clears app errors. Miss any one of these, and registration silently breaks.
This is the only 2026 guide that covers every platform-specific difference in full detail — with separate step-by-step instructions, device-specific troubleshooting, and fixes for the problems no other site has bothered to document.
What Is DITO SIM Registration and Why Is It Mandatory?
DITO Telecommunity Corporation is the Philippines’ third major telecom network, operating alongside Globe and Smart. Under Republic Act No. 11934 — the SIM Registration Act — every DITO subscriber, whether prepaid or postpaid, new or existing, is legally required to register their SIM card using a valid government-issued ID.
The law was enacted to reduce SIM-enabled fraud, scam calls, and illegal activities linked to anonymous prepaid numbers. Registration is enforced by the National Telecommunications Commission (NTC) and the Department of Information and Communications Technology (DICT). Failure to register results in permanent SIM deactivation – no calls, no texts, no mobile data.
The registration process is completely free and takes under 10 minutes when done correctly. The challenge is that most guides treat iPhone and Android users as if they’re using the same device. They are not — and that assumption is what causes most registration failures.
Quick Answer: What Is the Difference Between DITO SIM Registration on iPhone vs Android?
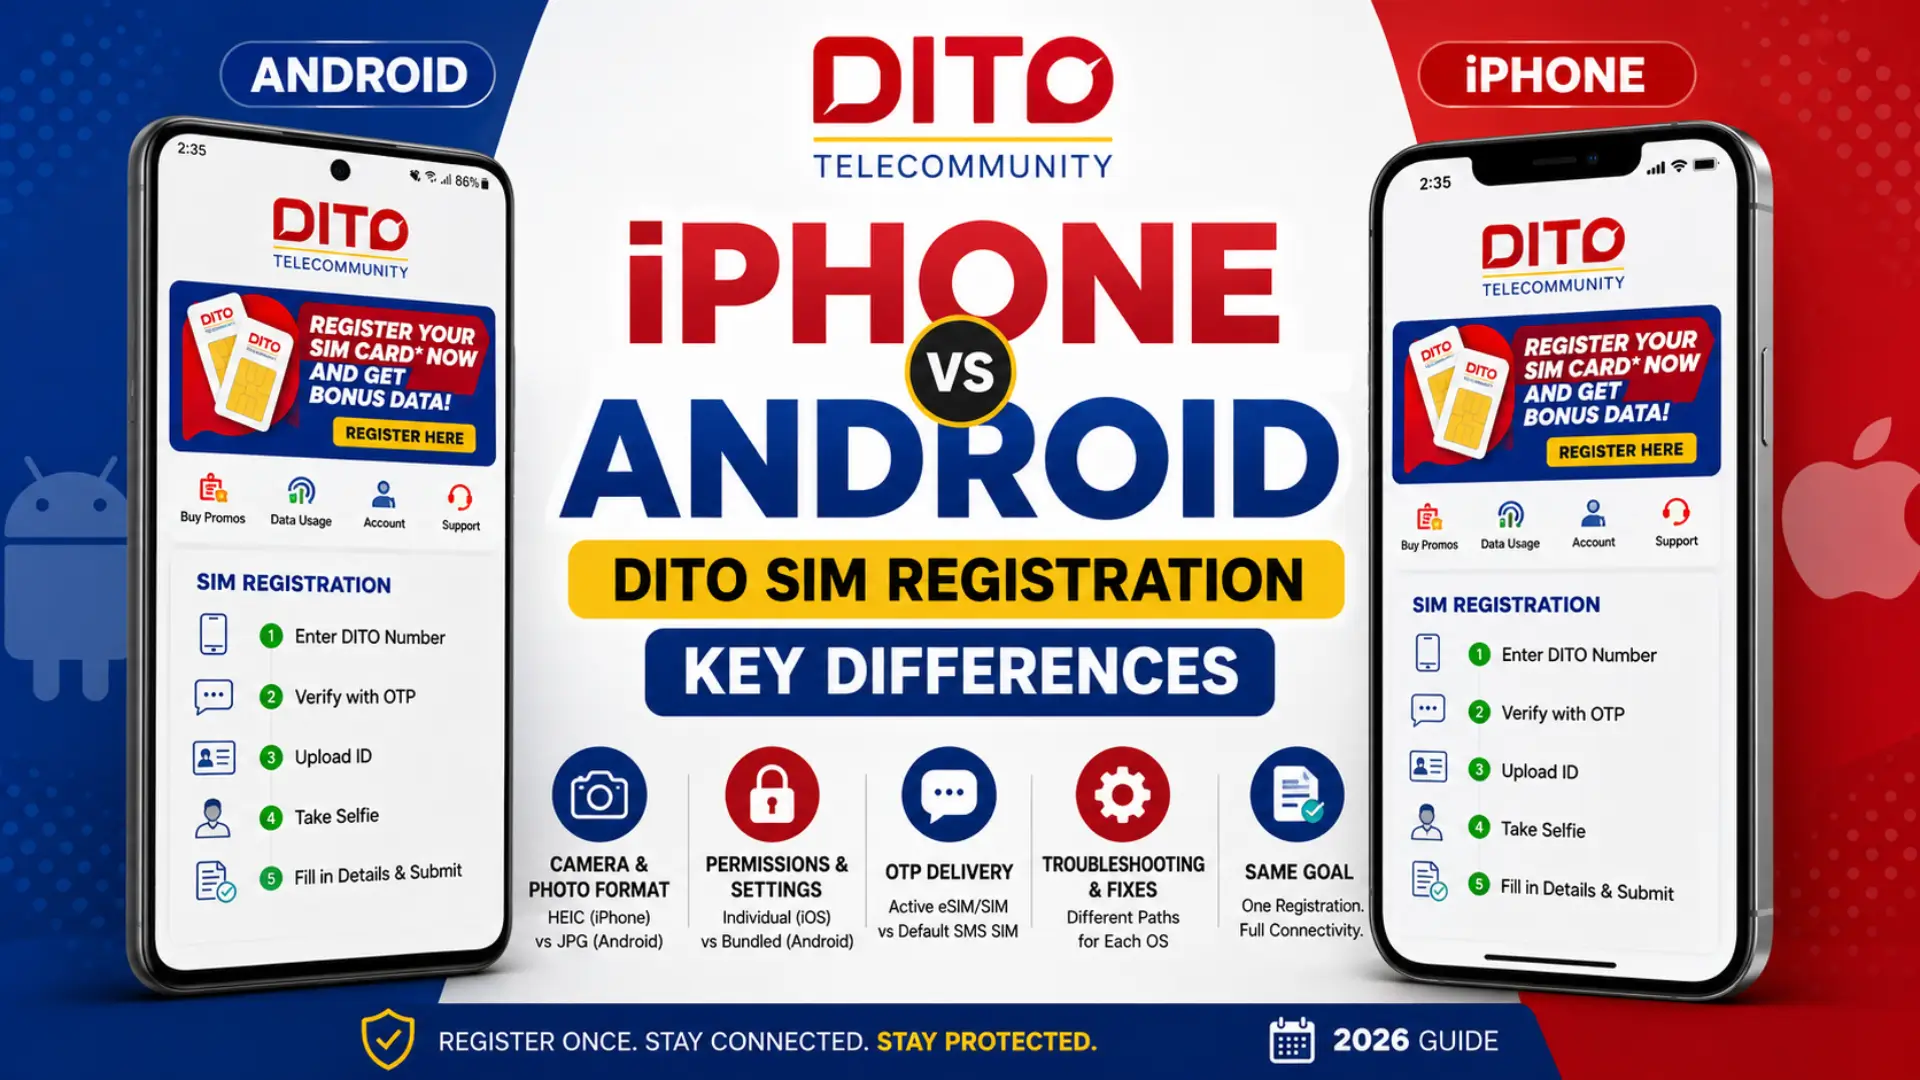
The registration form, requirements, and submission process are identical on both platforms. The difference is in how each operating system handles the supporting technical steps. Android grants the DITO app camera and storage permissions through a single bundled prompt. iOS requires you to manually approve each permission individually, and if you deny any of them by mistake, the app cannot ask again — you must re-enable them through iPhone Settings manually. Additionally, iPhones save photos in HEIC format by default, which the DITO registration system may reject. Android saves photos in JPG format, which is accepted without any conversion needed.
Requirements – What You Need Before You Start (iPhone and Android)
Both platforms require the same documents and setup before registration begins:
- A valid government-issued ID — PhilSys National ID, Passport, Driver’s License, UMID, PRC ID, Voter’s ID, SSS ID, or Senior Citizen ID
- Your DITO SIM card physically inserted in your phone
- A stable internet connection — WiFi is strongly recommended over mobile data
- The official DITO app downloaded from the Apple App Store (iPhone) or Google Play Store (Android)
- A clear, well-lit photo of your ID saved in JPG or PNG format, under 2MB in file size
- A clean selfie with no filters, glasses, masks, or heavy shadows on your face
iPhone users — do this before anything else: Go to Settings > Camera > Formats and select Most Compatible. This switches your iPhone camera from HEIC to JPG format. If you skip this step, your ID photo may cause a silent upload failure during registration.
Related Read: DITO Compatible Phones: Complete List of 4G and 5G Devices
DITO SIM Registration on Android – Step-by-Step
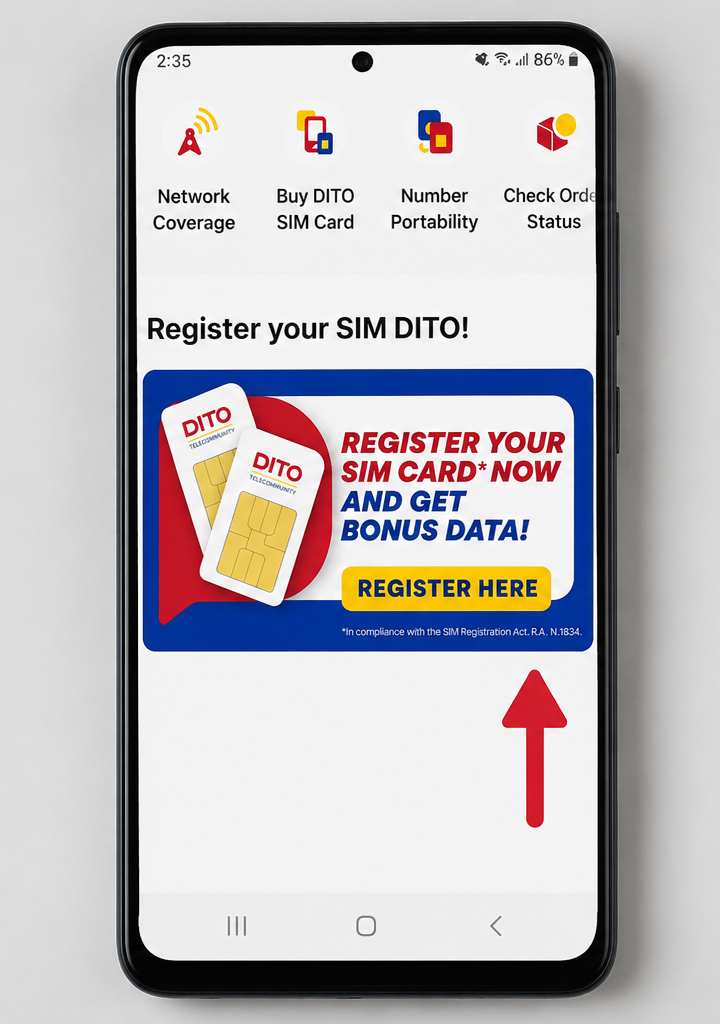
Step 1: Download the DITO App from Google Play
Open the Google Play Store and search for DITO or go directly to the official listing. Tap Install. The app requires Android 6.0 (Marshmallow) or later. If your phone runs an older version, update through Settings > System > Software Update or use the web registration portal at register.dito.ph instead.
When you open the app for the first time, Android displays a bundled permission prompt asking for access to your camera and device storage. Tap Allow for both. This is the only time Android asks — if you accidentally tap Deny, go to Settings > Apps > DITO > Permissions and re-enable Camera and Files/Media manually.
Step 2: Create an Account or Log In
Tap Register if this is your first time using the DITO app. Use your DITO mobile number as your account identifier and create a strong password. If you already have a DITO account, enter your credentials and log in. Forgot your password? Tap Forgot Password and choose Sign in via SMS — a one-time password (OTP) will be sent to your DITO number instantly.
Before logging in, make sure your DITO SIM is inserted, active, and showing network signal. The app cannot send or receive OTPs without an active SIM connection.
Step 3: Find the Registration Banner and Select Your Identity Type
On the app dashboard, you will see a banner that reads “Register Here.” Tap it. A dropdown will appear asking for your identity type — select the one that applies to you: Filipino, Minor, Foreign National, or Corporation. Enter your 11-digit DITO mobile number in the field provided and tap Next.
Step 4: Verify Your Number, Then Upload Your ID and Selfie
Tap Get OTP. A six-digit one-time password is sent via SMS to your DITO number. Enter it within 3 minutes — the OTP expires automatically after that window. If you are using a dual-SIM Android phone, make sure DITO is set as your default SMS SIM. Some phones deliver OTPs only to the SIM assigned as primary for messaging.
After OTP verification, tap the plus icon under Identification Card. On Android, you can take a live photo using your camera or upload an existing image from your gallery. The file must be under 2MB and saved as JPG or PNG. Android cameras typically save photos in JPG automatically, so this rarely causes issues. Make sure the entire ID is visible — no cut corners, no shadows, no glare on laminated surfaces.
After the ID photo, take your selfie. Face the camera directly in a well-lit area. No glasses, no filters, and avoid direct overhead lighting which creates facial shadows that can trigger liveness check failures.
Step 5: Fill in Personal Details and Submit
Enter your full name exactly as it appears on your uploaded ID, followed by your date of birth, gender, nationality, and complete residential address — including barangay, city/municipality, province, and zip code. Cross-check every field against your ID before submitting. Even a single character mismatch between your typed name and your ID photo can send your registration to manual review, adding up to 24 hours to the process.
Tap Submit. You will receive a confirmation SMS with a reference number. Screenshot this immediately — you will need it if you ever need to follow up with DITO support.
DITO SIM Registration on iPhone – Step-by-Step
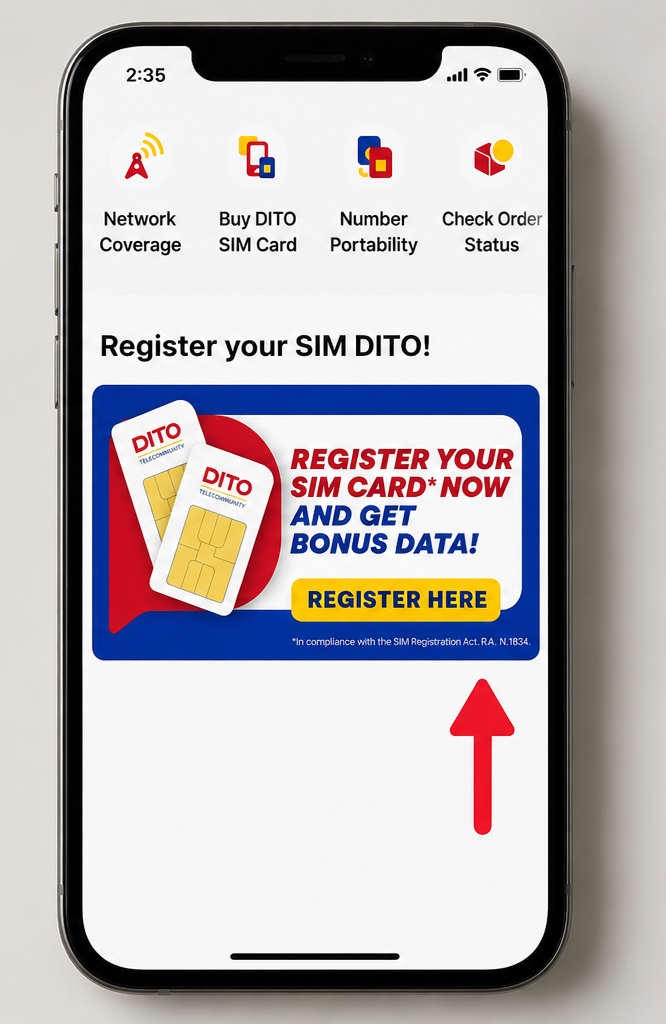
Step 1: Download the DITO App from the Apple App Store
Open the App Store and search for DITO Telecommunity or tap the official listing directly. Tap Get and authenticate with Face ID, Touch ID, or your Apple ID password to begin the download. The app requires iOS 13 or later.
If your iPhone does not support iOS 13 — this includes iPhone 5s, 6, and 6 Plus — you cannot use the DITO app. Use the web registration method instead: open Safari and go to register.dito.ph to complete registration through the browser form.
Critical step before opening the app: Go to Settings > Camera > Formats and switch from High Efficiency to Most Compatible. This forces your camera to save photos as JPG instead of HEIC. Do this now, before you take any photos for registration.
Step 2: Handle iOS Permissions Carefully
When you open the DITO app for the first time on iPhone, iOS displays individual permission prompts — one for Camera access and one for Photo Library access. Unlike Android, which bundles these into one prompt, iOS asks for each separately and never asks again if you deny either one.
Tap Allow when the Camera prompt appears. Tap Allow Access to All Photos when the Photo Library prompt appears.
If you accidentally tapped Don’t Allow on either prompt, go to:
- Camera permission: Settings > Privacy & Security > Camera > DITO — toggle ON
- Photo Library permission: Settings > Privacy & Security > Photos > DITO — set to Full Access
After re-enabling permissions, force-close the DITO app by swiping it away in the app switcher, then reopen it.
Step 3: Create an Account or Log In
The account setup process on iOS is identical to Android. Tap Register for a new account or log in with existing credentials. If you are logging in via OTP, confirm your DITO SIM is inserted and showing signal in your iPhone’s status bar before requesting the OTP.
Note for older iPhone users: iPhone 7, 8, and SE (2nd generation) with limited RAM may experience slow app loading or occasional freezes during registration. Close all other apps running in the background before opening DITO to prevent mid-registration crashes.
[IMAGE: DITO app login screen on iPhone — Alt text: “DITO app login and account creation screen on iPhone”]
Step 4: Upload Your ID — The HEIC Problem and How to Fix It
This is the step where most iPhone registrations fail. Even after switching to Most Compatible format in Step 1, any photos already saved in your iPhone gallery will still be in HEIC format. If you plan to upload an existing gallery photo of your ID, you need to convert it first.
Three ways to fix the HEIC problem:
- Option A — Retake the ID photo after changing camera format to Most Compatible. This is the cleanest fix.
- Option B — Share the HEIC photo to your Files app, then use an online converter or a free app like Image Convert (App Store) to save it as JPG before uploading.
- Option C — Email the HEIC photo to yourself, download it from Mail — iOS automatically converts HEIC to JPG when attaching to emails sent outside Apple’s ecosystem.
Once your ID photo is in JPG format and under 2MB in size, tap the plus icon under Identification Card in the DITO app and upload it. Ensure all four corners of your ID are visible and the surface is evenly lit with no glare.
Step 5: Take Your Selfie, Complete the Form, and Submit
After uploading your ID, the app will prompt you to take a selfie for liveness verification. Use natural light from a window rather than indoor overhead lighting. If you are using an iPhone with Face ID (iPhone X or later), the TrueDepth front camera is high quality — but avoid taking the selfie in direct sunlight, which overexposes facial features and can cause verification failure.
If your selfie keeps getting rejected, try switching to the rear camera. Take a photo of yourself reflected in a mirror using the rear camera — the higher resolution sometimes passes liveness checks that the front camera fails.
Fill in all personal details matching your ID exactly. Tap Submit. Save the confirmation SMS and reference number immediately.
Variations and Special Cases
Dual-SIM Android Phones Insert the DITO SIM in SIM Slot 1 before starting registration. Android phones route OTP messages through the primary SIM by default. If DITO is in Slot 2, you may never receive the OTP. Go to Settings > SIM Card Manager and set DITO as the default for calls and SMS before opening the app.
iPhone with DITO as eSIM If DITO is running as an eSIM on iPhone 12 or later alongside a physical SIM from another carrier, go to Settings > Cellular and make sure DITO is set as the active data line before starting registration. The app routes OTPs through whichever SIM has active data service.
Minors Under 18 A parent or legal guardian must complete registration on behalf of the minor. The guardian’s valid ID and selfie are used for verification. The minor’s name, date of birth, and personal details are entered in the form fields. The registered SIM is legally associated with the guardian’s identity.
Foreign Nationals Additional documents are required depending on visa type. Students need school registration documents. Workers need an Alien Employment Permit (AEP) or ACR I-Card. Tourists can register using a valid passport. The identity type dropdown will prompt you for the appropriate documents based on your selection.
Registration at a DITO Experience Store If app registration fails repeatedly on both iPhone and Android, visit the nearest DITO Experience Store or authorized partner outlet in person. Bring your SIM card, the original packaging, and one valid government-issued ID. Store staff will complete the registration on your behalf at no cost.
Comparison Table 1: DITO SIM Registration – iPhone vs Android
Feature | iPhone (iOS) | Android |
|---|---|---|
App Download Source | Apple App Store | Google Play Store |
Minimum OS Required | iOS 13 or later | Android 6.0 (Marshmallow)+ |
Permission Prompt Style | Individual prompts — must approve each separately | Single bundled prompt on first launch |
Default Photo Format | HEIC — must convert to JPG before upload | JPG — accepted without conversion |
Permission Reset Path | Settings > Privacy & Security > Camera > DITO | Settings > Apps > DITO > Permissions |
Cache Clearing Method | Settings > General > iPhone Storage > Offload App | Settings > Apps > DITO > Storage > Clear Cache |
eSIM Activation Path | Settings > Cellular > Add Cellular Plan | Settings > Connections > SIM Manager > Add Plan |
OTP Delivery Behavior | Delivered to inserted physical or active eSIM | Delivered to default SMS SIM (Slot 1 recommended) |
Crash Risk on Older Devices | Higher — older iPhones have limited RAM | Lower — Android manages memory more flexibly |
Photo Size Issues | Common — high-res HEIC files exceed 2MB limit | Less common — JPG compresses automatically |
APN Setup | Manual setup may be needed on some models | Configured automatically by the DITO network |
Comparison Table 2: DITO App Registration vs Web Portal
Feature | DITO App | Web Portal (register.dito.ph) |
|---|---|---|
Platform Availability | iOS and Android | Any browser — phone, tablet, or computer |
ID Auto-Fill from Photo | Yes — app reads ID and pre-fills form fields | No — all fields must be filled manually |
Selfie Capture | Live in-app camera | Upload from device gallery |
Completion Speed | Faster — guided flow with fewer steps | Slightly slower — manual form entry |
Works Without App | No | Yes |
Best Use Case | Primary method for all smartphone users | Fallback when app installation fails |
Supported File Formats | JPG, PNG | JPG, PNG |
OTP Verification | SMS to active DITO SIM | SMS to active DITO SIM |
Registration Status Check | Visible on app dashboard | Not available — use app to check |
Warning: Do NOT Make These Mistakes
Uploading an HEIC photo without converting it first (iPhone)
Your upload may appear to succeed but the registration gets stuck in a permanent “under review” state with no error message. Always confirm you are uploading a JPG file — check the file extension before uploading. HEIC and JPG are not interchangeable in DITO’s verification system.
Tapping “Don’t Allow” on any iOS permission prompt
iOS will never ask again after a denial. The DITO app cannot work around this. You must go into iPhone Settings and re-enable the permission manually. Many users spend over an hour trying to figure out why their camera does nothing when tapped inside the app — the reason is always a denied permission.
Waiting too long to enter the OTP
The OTP expires in exactly 3 minutes. Do not request it until you are ready to type it immediately. If you switch apps, receive a call, or get distracted, the OTP will expire and you will have to restart the verification step. Have everything else ready before tapping Get OTP.
Uploading a partially visible or shadowed ID photo
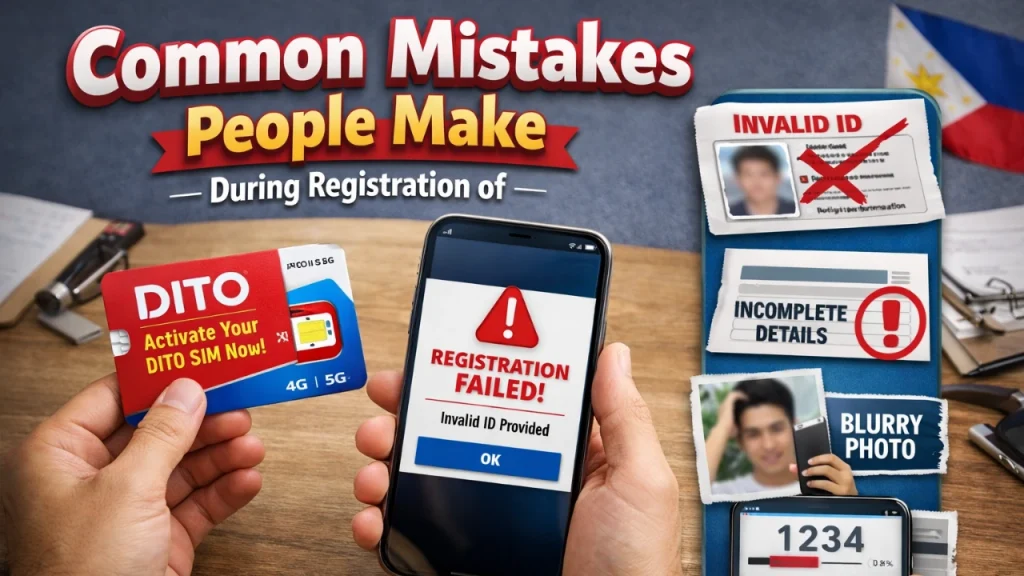
Automated ID verification rejects any photo where a corner is cut off, the text is obscured, or the surface has glare from lamination. A rejected ID photo sends your registration to manual review — adding up to 24 hours to your activation timeline. Take the photo in open shade, not direct sunlight or indoor lighting.
Downloading the DITO app from a third-party source
Unofficial APK files and sideloaded apps do not connect to DITO’s actual registration servers. They may also contain malware targeting Philippine subscribers. Only download from the official Apple App Store or Google Play Store.
Ignoring the “SIM Already Registered” error
If you receive this error and you did not register the SIM yourself, it means someone else — possibly a reseller or store staff — has registered that number to another identity. Contact DITO immediately at 185 and file a formal dispute. This is a security issue, not a technical glitch.
Pro Tips for Fast and Successful Registration
Use WiFi, not mobile data, for the entire process
The ID and selfie uploads are the steps most likely to fail. A weak 4G signal makes uploads time out silently. Connect to a stable WiFi network before opening the app — especially for first-time registrations.
Use the rear camera for your ID photo, front camera for selfie
The rear camera on both iPhones and Android phones captures significantly higher detail than the front camera. A sharper ID photo means faster automated verification and fewer rejections.
Take your selfie near a window, not under ceiling lights
Natural side-lighting from a window eliminates harsh shadows on your face. Overhead lights create dark shadows under your eyes and nose, which interfere with liveness detection algorithms. One simple lighting change eliminates most selfie rejections.
Update the DITO app before you start
An outdated DITO app version is one of the most common causes of blank screens, login failures, and form submission errors. Check the App Store or Google Play for updates before opening the app for registration.
On iPhone with iOS 17 or later, check Screen Time restrictions
iOS 17 Screen Time can block camera access for specific apps even when Privacy & Security permissions are enabled. If your camera still does not work inside the DITO app after enabling the permission, check Settings > Screen Time > Content & Privacy Restrictions > Camera.
Save everything after submission
Screenshot the confirmation screen. Save the reference number SMS. Note the date and time of submission. If your registration goes to manual review or gets flagged incorrectly, DITO support will ask for your reference number before they can do anything. Without it, follow-up becomes significantly harder.
Troubleshooting: 5 Real Problems with Device-Specific Fixes
Problem 1: Camera Does Not Open Inside the DITO App (iPhone Only)
Why it happens: The camera permission was denied when the app first launched. iOS does not re-prompt after an initial denial.
Fix: Go to Settings > Privacy & Security > Camera. Scroll down and find DITO in the app list. Toggle the switch to ON. Then open your app switcher by swiping up from the bottom of the screen, swipe the DITO app away to close it completely, and reopen the app. The camera will now work inside registration.
Problem 2: ID Photo Upload Keeps Failing
iPhone fix: The file is most likely in HEIC format. Go to Settings > Camera > Formats > Most Compatible, then retake the ID photo and upload the fresh JPG version.
Android fix: The file may exceed 2MB. Open your gallery app, find the ID photo, and check its file details. If it exceeds 2MB, use a free compression app or reduce the camera resolution in your camera app settings before retaking the photo.
Both platforms: Try the gallery upload option instead of live camera capture. If you use the in-app camera and it fails, select the photo from your gallery instead — this uses a different upload path that sometimes bypasses the error.
Problem 3: OTP Is Not Being Received
Step 1: Remove the DITO SIM from your phone, wait 10 seconds, and reinsert it firmly. Restart your phone completely.
Step 2 (Android dual-SIM users): Go to Settings > SIM Card Manager and confirm DITO is set as the default SIM for SMS and calls.
Step 3 (iPhone eSIM users): Go to Settings > Cellular and confirm DITO is the active line, not just a secondary line with data turned off.
Step 4: Wait 5 full minutes, then tap Resend OTP. Some network congestion causes delayed delivery. If the OTP still does not arrive after two attempts, call DITO support at 185 and request manual identity verification.
Problem 4: DITO App Crashes or Freezes During Registration
Android fix: Go to Settings > Apps > DITO > Storage > Clear Cache. Then go to the Google Play Store, search DITO, and update the app to the latest version. Restart your phone and try again.
iPhone fix: Go to Settings > General > iPhone Storage. Find DITO in the app list and tap Offload App. This removes the app but keeps your account data. Then tap Reinstall App to get a clean installation. Make sure you have at least 500MB of free storage before reinstalling.
Both platforms: If the crash happens consistently at the same step — such as during selfie capture — it usually indicates a RAM issue on older devices. Close every other app, restart your phone, and open the DITO app as the only active application.
Problem 5: Registration Stuck on “Under Review” for More Than 24 Hours
What this means: Your ID photo, selfie, or submitted information was flagged for manual review. This is triggered by photo quality issues, a name mismatch between your typed entry and ID photo, or an HEIC file that was accepted at upload but rejected during backend processing.
Fix: Open the DITO app and check your registration status on the dashboard. If the status has not changed after 24 hours, contact DITO support through the in-app chat or call 185 using your DITO number. Provide your reference number from the submission confirmation SMS. Manual review cases are typically resolved within 1 business day when the reference number is provided.
Best Practices for DITO SIM Registration in 2026
- Always download the latest DITO app version before starting — the app receives security and UI updates monthly that directly affect registration flow stability
- Prepare your ID photo before opening the app — convert to JPG, confirm it is under 2MB, verify all four corners are visible, and check for glare on laminated surfaces
- Use WiFi throughout the entire process — both upload steps (ID and selfie) are vulnerable to mobile data interruptions that cause silent failures
- Set your iPhone camera to Most Compatible format permanently — this benefits not just DITO registration but every other app or service that requires photo uploads
- On dual-SIM Android devices, assign DITO as the default SMS SIM before starting — this single step prevents the majority of OTP delivery failures reported by Android users
- Screenshot your reference number and confirmation SMS the moment they appear — DITO customer support cannot process follow-ups without a reference number, and the confirmation screen is not accessible again after you navigate away
Frequently Asked Questions
Conclusion
DITO SIM Registration on iPhone vs Android follows the same legal requirements, the same form, and the same submission process. But the technical experience is genuinely different between the two platforms — and those differences are specific enough that a guide covering only one of them is half a guide.
iPhone users need to handle camera permissions manually, convert HEIC photos to JPG, and occasionally configure APN settings that Android handles automatically. Android users need to manage SIM slot assignments on dual-SIM devices and keep an eye on app cache when things go wrong. Knowing these differences before you start eliminates the frustration that sends most people to DITO stores for help that they could have avoided entirely.
Disclaimer: This article is for informational purposes only and reflects DITO Telecommunity’s registration process as of May 2026. DITO may update its app, portal, or registration requirements without prior notice. Always refer to dito.ph or contact DITO support at 185 for the most current and legally binding instructions.